
Miniature bakery, patisserie, and dessert charms hold an enduring fascination for jewelry enthusiasts and miniature collectors alike. From fluted fruit tart shells and iced croissant studs to waffle cones and citrus slices, culinary motifs invite playful color blending and tactile surface texturing. Yet despite their cheerful aesthetic, miniature dessert cutters are notorious for causing chronic bench frustration: tiny fluted scallops trap raw clay like a vice, sharp icing drip valleys clog after two cuts, and delicate crust rims tear during unmolding.
The root cause of these production failures lies in the fluid dynamics of raw polymer clay under compression. When cutting deeply scalloped or serrated contours, if the valley gap between two adjacent cutting teeth drops below a critical mechanical threshold, raw clay becomes hopelessly compressed within the wedge. Instead of parting cleanly, the clay sticks to the plastic walls, pulling the entire earring apart when the cutter is lifted.
In this technical studio manual, we detail the engineering rules behind CutClay’s bakery and fruit catalog (catalog series sweets_001 through sweets_019 and fruit_001 through fruit_020), dissect the mandatory 2.4mm minimum blade gap threshold, and share professional pastry texturing workflows using chalk pastels, needles, and liquid clay glazes.
The 2.4mm Blade Gap Threshold: Preventing Trapped Clay Serrations
When an artist cuts into a 2.5mm slab of conditioned polymer clay, the material displaced by the cutter’s 0.4mm knife edge must flow somewhere. On flat perimeters, the clay simply bulges slightly outward. However, in narrow acute valleys—such as the deep serrations of a pie crust or the drip valleys of melting frosting—the displaced clay from both sides converges in the center.
If the distance between adjacent blade tips in a valley is less than 2.40mm, the converging clay is compressed beyond its elastic limit. The clay adheres mechanically to the microscopic layer lines of the 3D-printed cutter wall, forming a rigid wedge. No amount of cornstarch or soapy water will prevent this entrapment once the geometry violates this threshold.
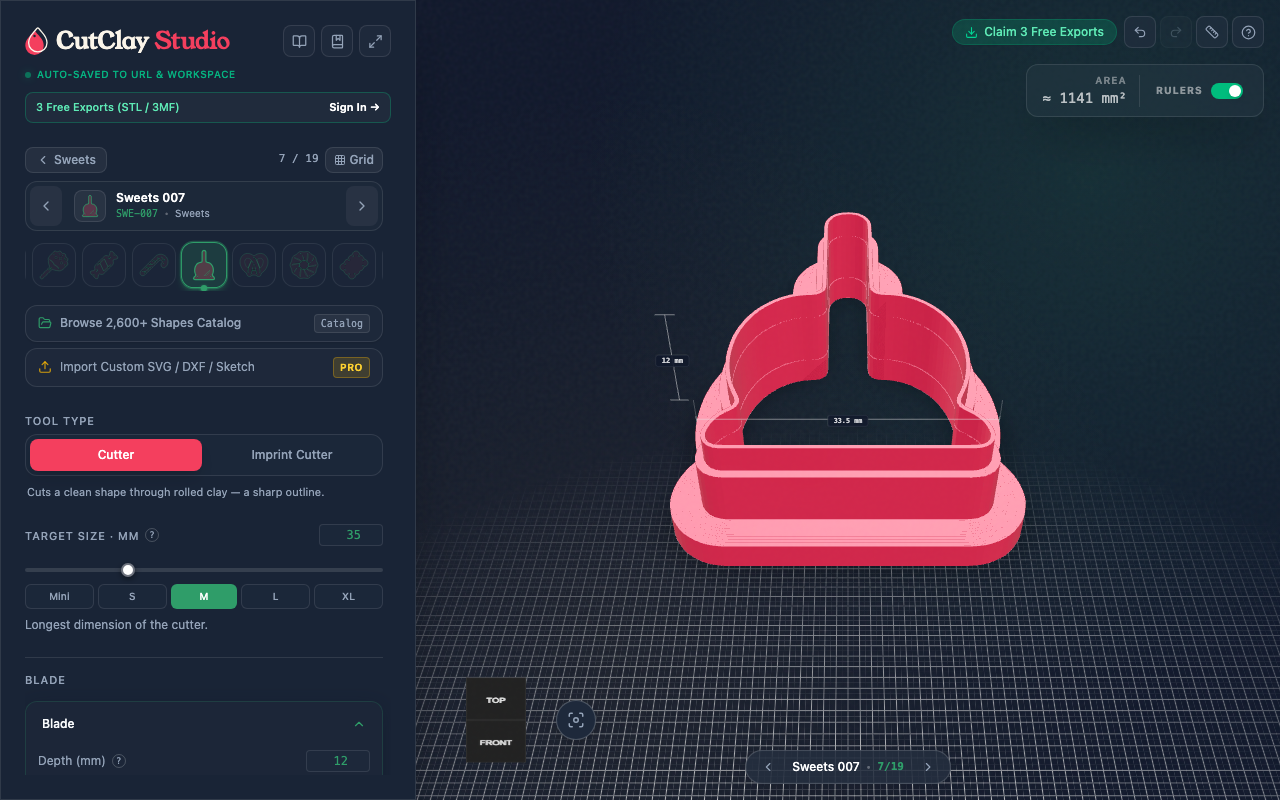
In CutClay’s bakery models (such as the fluted tart shell sweets_007), every scallop valley incorporates an engineered fillet radius of at least R0.6mm, ensuring that the opening between teeth never narrows below 2.50mm. Additionally, the interior walls feature a generous 16° outward draft angle, allowing raw clay to expand and slide free instantly upon release.
Fluted Tart Cameos & Multitier Bakery Sets
Creating realistic miniature bakery jewelry requires combining structural foundations with delicate decorative toppings. CutClay’s dessert collection supports three primary assembly techniques:
- Fluted Crust Bases (
sweets_001tosweets_008): Scalloped tart and pie shells designed to be cut from translucent or ochre-tinted clay. The cutter creates a firm base with high outer walls that contain liquid polymer clay fillings. - Icing Drip & Glaze Overlays (
sweets_009tosweets_014): Companion cutters sized with a 0.3mm perimeter offset that fit perfectly atop the base pastries, mimicking dripping royal icing, melted chocolate, or fruit coulis. - Citrus & Fruit Medallions (
fruit_001tofruit_020): Round and wedge cameos with interior blade ribs that imprint wheel spokes and segment lines onto raw clay, ideal for making lemon, lime, and blood orange cane slices.
Test these scaled pastry outlines directly in CutClay Studio for sweets_007 or view all matching dessert shapes in the sweets category catalog.
Parametric Dimensions for Miniature Bakery Cutters
The following parametric values are calibrated specifically for miniature dessert and fruit jewelry:
| Design Parameter | Standard Benchmark | Production Benefit |
|---|---|---|
| Target Diameter (Studs) | 14.0 mm – 18.0 mm | Realistic miniature scale matching real French macarons |
| Target Diameter (Cameos) | 28.0 mm – 34.0 mm | Ample surface area for multi-fruit and cream assemblages |
| Minimum Valley Gap | ≥ 2.40 mm | Guarantees raw clay never jams inside fluted serrations |
| Scallop Fillet Radius | ≥ R0.60 mm | Smooth root curves eliminate micro-tears on crust edges |
| Blade Height | 11.0 mm | Deep enough for thick 3.5mm textured pie crust blanks |
3D Slicer Profile: Precision Printing of Scalloped Edges
Because miniature bakery cutters have dozens of tight directional shifts along their fluted perimeters, small nozzle diameters and fine layer heights yield dramatic improvements in edge sharpness:
| Slicer Setting | Optimal Setup | Mechanical Result |
|---|---|---|
| Nozzle Recommendation | 0.2mm Nozzle Preferred (or 0.4mm tuned) | 0.2mm nozzle resolves micro-fluting under 15mm scale |
| Layer Height | 0.10 mm – 0.12 mm | Eliminates stepped ridges on the fluted perimeter curves |
| Inner/Outer Wall Overlap | 25% | Prevents delamination between thin scallop ribs |
| Print Speed (Outer Walls) | 25 mm/s | Avoids corner rounding on delicate scallop points |
| Ironing | Disabled | Ironing tends to melt and dull fine 0.4mm blade tips |
Artisan Texturing Protocol: From Raw Cut to Baked Patisserie
Follow this multi-stage bench protocol to achieve realistic bakery textures on cured jewelry:
- Slab Conditioning: Blend 70% translucent clay with 20% ecru/raw sienna and 10% white clay. Translucent base clay gives baked pastries a believable, light-permeable crumb structure. Roll to 3.0mm thickness.
- Stamping with Plastic Wrap: Lay ultra-thin plastic wrap over the clay before stamping. The plastic softens the sharp cutting blade slightly, creating realistic, soft dough-like scallop edges reminiscent of hand-crimped pie crusts.
- Pre-Bake Surface Texturing: Remove the plastic wrap. Stipple the interior crust floor using a clean stiff toothbrush or brass wire brush to simulate baked sponge cake. Tap a sewing needle along the edges to create flaky pastry laminations.
- Chalk Pastel Shading: Scrape soft chalk pastels (golden ochre, burnt sienna, and warm sepia) into a fine powder. Using a dry fluffy makeup brush, dust the powder lightly onto the high points of the crust scallops. In the oven, the clay plasticizer melts slightly, bonding the chalk pastel pigment permanently into the clay surface with an authentic golden-baked gradient.
- Liquid Clay Glazes: After baking at 130°C for 45 minutes, fill tart cavities with translucent liquid clay tinted with alcohol inks (raspberry red, blueberry violet, or lemon yellow). Cure under a heat gun or in a secondary 15-minute bake to achieve a glossy fruit jam finish.
Explore CutClay Studio to view the complete sweets collection and craft mouth-watering miniature jewelry designs for your shop.